NTX9DESIGN
  • Home
  • Maryhill Chess Set
  • Astrophotography
  • Blog
  • Roland GK Mount
  • Design Gallery
  • Contact
  • M3D Crane Quad
  • Chess Purchase

Blog

Maryhill Museum Installation

3/11/2020

0 Comments

 
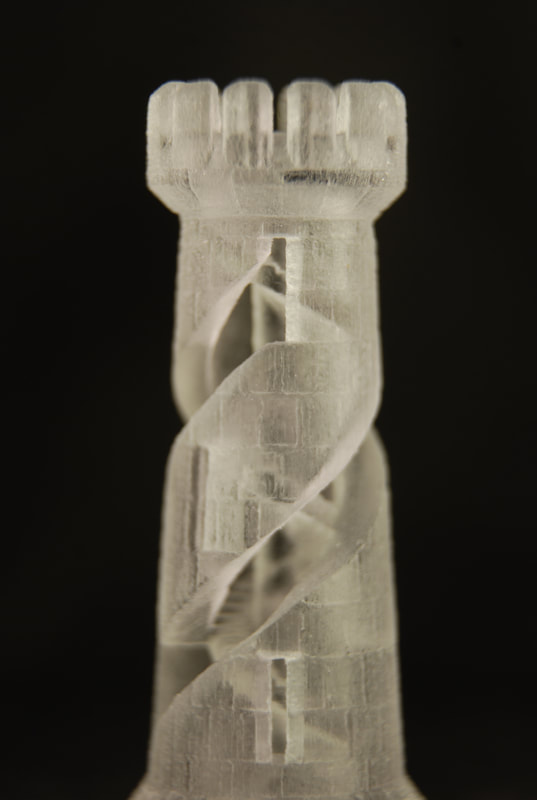
I am proud to say that when Maryhill Museum opens for the 2020 season my chess set will be on display in the George E. Muehleck, Jr. Gallery of International Chess Sets.  It is a great honor to have my design exhibited among such a fantastic collection of artwork.  For this installation I fabricated my first chess board.  The board and surrounding frame is composed of 3d printed tiles of the same material as the pieces.  The infill pattern of each square and portions of the frame are visible and provide a texture that reflects light with a depth and shimmer unlike a smooth surface.
https://www.maryhillmuseum.org/

Unfortunately, the spring opening of Mayhill Museum of Art has been overshadowed and delayed by Covid 19 so in the mean time you can enjoy a sneak peak at the chess set here. 
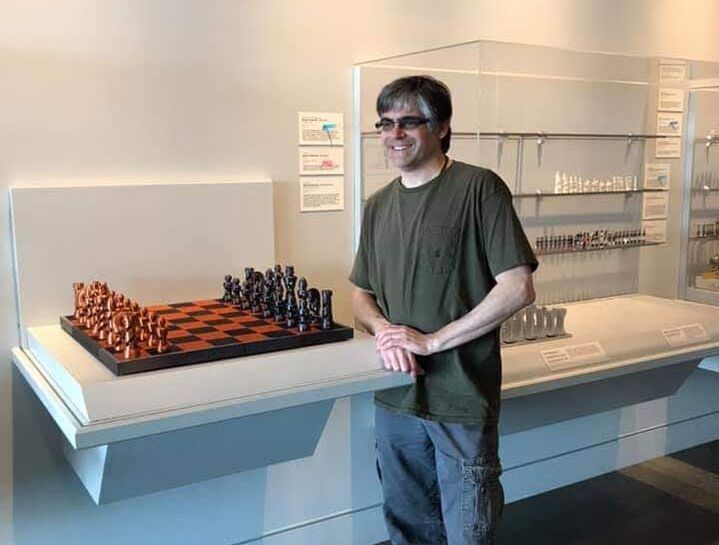
Picture
0 Comments

Maryhill Museum of Art

1/14/2020

0 Comments

 
Set on a stunning 5,300-acre site overlooking the scenic Columbia River Gorge in southern Washington State, Maryhill Museum of Art is one of the Pacific Northwest’s most fascinating cultural destinations and located just 100 miles east of Portland, Oregon.

The museum features artwork including permanent exhibitions by Auguste Rodin, Ingeniousness Peoples of North America and many others.


In addition to a fantastic collection of sculptures and paintings, Mary Hill features the stunning George E Muehleck, Jr. gallery of international chess sets. 

We are currently working though the final details for the Organic Chess set to be on display at the Museum this spring.   It will be a great honor for this set to be part of such a prestigious collection.

​More information to come...
Picture
0 Comments

Fall Arts Walk 2019

10/3/2019

0 Comments

 
 I will have two chess sets on display at Hot Toddy for the Fall Arts Walk on Friday October 4. 

In addition to my copper and silver silk set, I am excited to unveil  a prototype magnetic chess board and set.  

Patricia Thulin will and several other artist have original artwork on display as well.

Please stop by and see us during the event.  Hot Toddy is located at 410 Capitol Way S, Olympia.
Picture
0 Comments

May 15th, 2019

5/15/2019

0 Comments

 
So almost a year ago I ordered a new M3D Crane Quad 3d printer.  This product was promoted under a kickstarter style purchasing option.  There is a lot that has happened in the year since I made the initial purchase but today the printer arrived.  Unfortunately, there are a couple problems that will delay me being able to try the printer out.

​​It appears to have been well packaged and there was no damage to the box. But one of the cables that connect to the screen was badly damaged. I contacted M3D but it is after hours so I am not expecting any response till tomorrow.

Picture
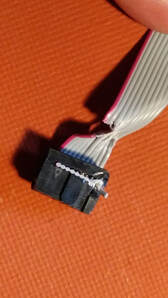
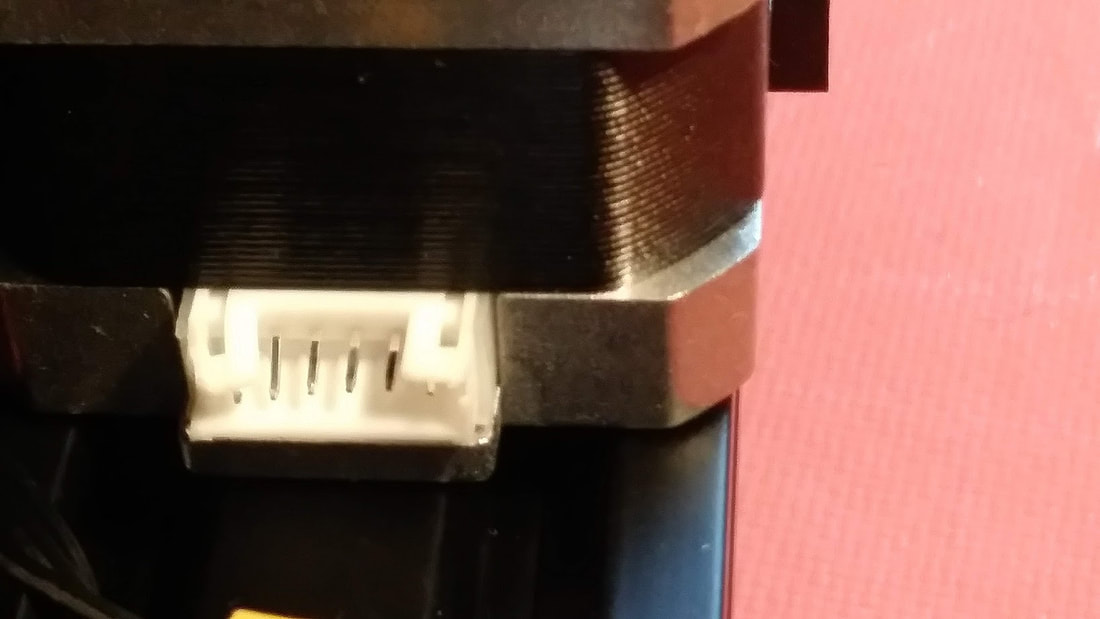
​There are a few other things I noticed that deserve comment. The connector on one of the stepper motors was slightly damaged but not beyond use. 

Also, it seems like the wiring is a generally shorter than it probably should be. For example, the X stepper wire seems to be about 2" short and pulls out of the stepper if I raise the X gantry near the top of the range. The wiring generally seems to be on the wimpy side. I would expect the stepper wires to be a somewhat heavier gauge. Then again the steppers themselves are quite a bit smaller than the ones on my Prusa Mk2.

Another thing I noticed even from photos and video, it seems like there is room for improvement in cable management. Not only are some of the cables on the short side but they are more messy that I would like to see. For example I noticed that there is a potential for one of the extruder motor wires to get caught under the X carriage wheels.

I did shoot some video of unboxing and partial assembly. Will post some stills later.
Picture
Picture
0 Comments

Time Lapse

8/11/2018

0 Comments

 
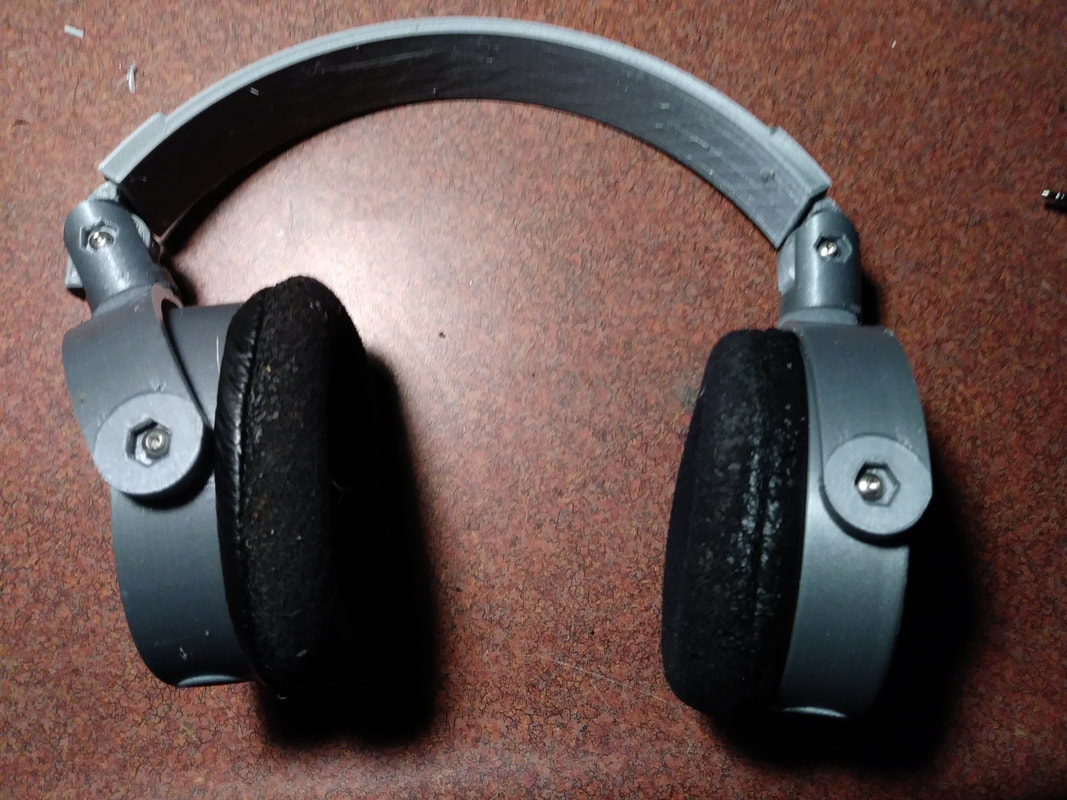
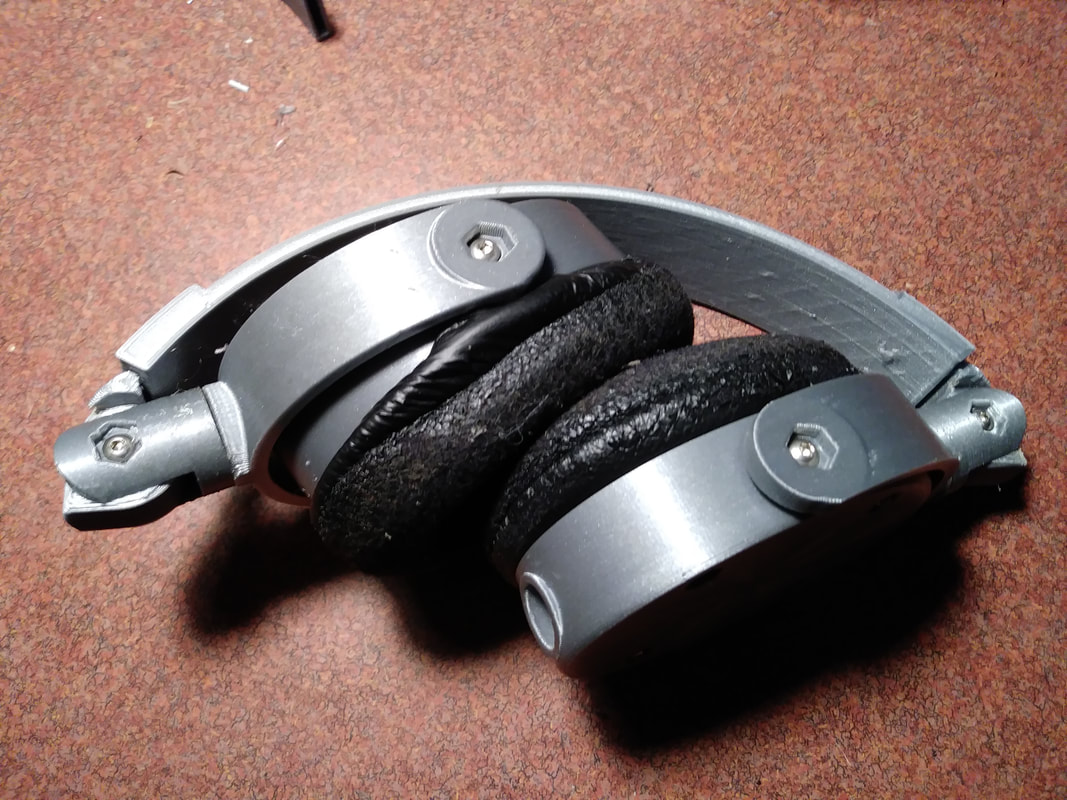
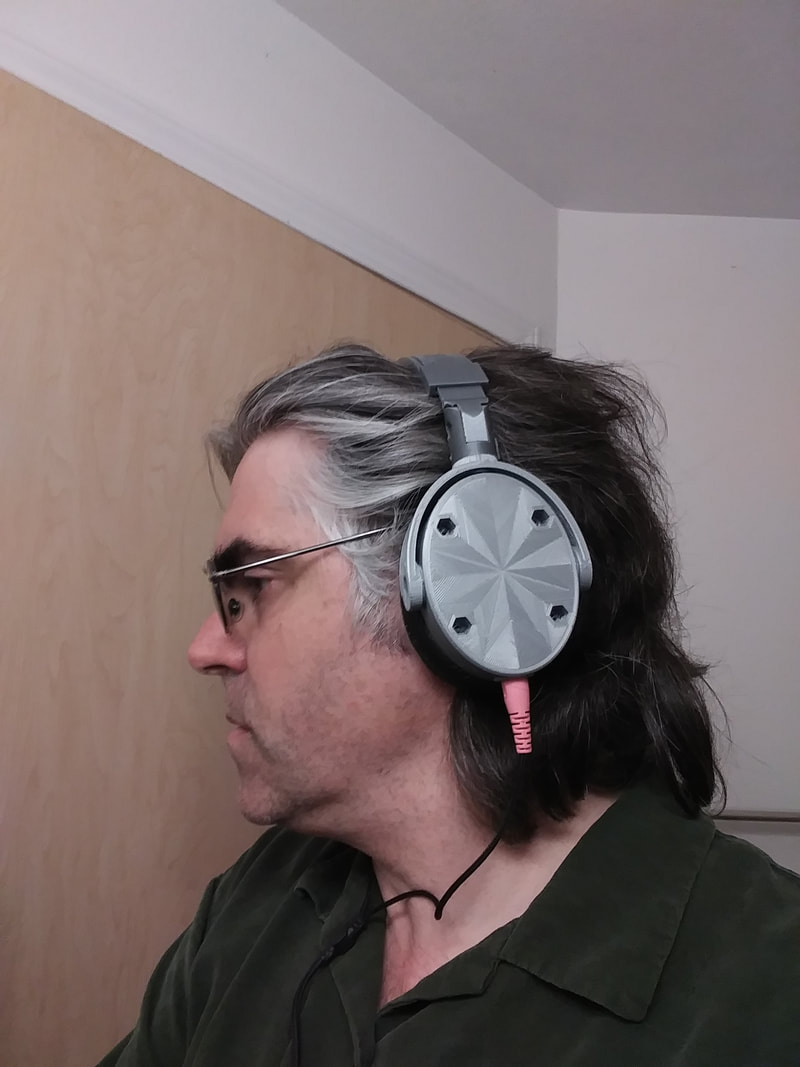
​Here is a time lapse video of some new headphone parts being printed.  The actual print ran for 3 hours.
0 Comments

3D Printed Headphones

8/7/2018

0 Comments


The Problem

For years I have been frustrated by the quality and cost of headphones.  Either they are excessively expensive or poorly made, disposable products.  Many times I have attempted to repair a set, only to find they were glued together, made from fragile components or otherwise not serviceable.  At the other end there may not be parts available for some higher quality headphones that might otherwise be serviceable.
I searched some of the downloadable designs available on Thingiverse and found a few options.  I printed one of these options.  But generally each of these designs were lacking in some area.   Ultimately I decided to design a set from scratch.

Parts Sourcing & Design

I started off working in 123Design but quickly switched to Fusion 360. My intent was to create a fairly universal design template that could be modified.  There were a number of parameters that I decided to incorporate into the designed .
  • 40mm drivers (speakers) that are readily available from a variety of sources. 
  • Foam pads that can be purchased as replacements.
  • Removable, plug in style cables.
​My intent was to source parts that were readily available online.  Many of the parts can be obtained through Ebay, Bangoods, Amazon or other vendors.  However, there are some things to consider.  
  • Drivers, none of the online vendors provide much in the way of specifications.  Short of impedance numbers, there is little information on frequency range design intent (open back or closed back) etc.
  • Foam Pads.  There are a lot of options out there many are intended as replacements for round pads that press on your ear.   I wanted something that goes over the ear and is elliptical in shape but did not want to have the cans be overly large.  I settled on replacement pads for Sennheiser hd202 headphones.  This was largely due to having pads laying around from a broken set of hd202 cans.  
  • Cables and connectors. My first plan was to go with a forked cable that has 3.5mm or 2.5mm plugs at the cans.  This was actually more challenging to source than I anticipated but still available.   I also ordered 3.5mm jacks for the headphones.
  • Connectors.  I purchased M3 machine screws and nuts at a local hardware store.

More on Cables And Connectors.

So many options:
  • Hard wired vs Connectors.
  • Y cable vs Straight.
Hard wired cables are the cheapest way to go but ultimately strain on the cables will require the cables to be re-soldiered.  Plug in cables add cost but can easily be replaced without having to disassemble the headphones.  (Assuming the connectors are durable)
Y cables are harder to source but eliminate the need to snake a connector across or through the headband.  Also, if there is a wire between the cans, should it be hard wired or also use connectors...

Prototype

I printed the plastic parts in silver PLA.   The assembly process was a good lesson in constructability.
  • M3 Screws and Nuts: Using M3 screws with backing nuts seemed like a good idea but I found the assembly to be a fiddly process with the tiny screws and nuts.  Also the part count gets to be a pain.  I see now why so many commercial headphones use essentially wood screws into the plastic parts.  I am already reworking the design with this in mind.
  • Shims: I designed hat shaped shims or washers wherever there are rotating parts.  In practice these worked OK but have a tendency to work themselves loose.  I don't want to use nylon lock nuts on the already fiddly screws so am reworking the shims so they have a hex insert into the opposing part to prevent loosening.  Will also rework the shims for wood screws.
  • Headband:  I knew it would take a few tries to get this part right.  In order to be adjustable I designed them to work similar to a zip tie.  First print was too tight, second too loose...   Both could be a little thinker and more springy.
  • Cables:  I found a reasonably suitable cable in a junk box of audio crap I keep in my garage. But the 3.5mm connectors I purchased on Ebay are of marginal quality.   Long and short, I am still on the fence about hard wiring the chords or using plugs.
Picture
Picture
Picture
0 Comments

Arts Walk write up in The Olympian

10/31/2017

0 Comments

 
It has been a few weeks since Arts Walk and I almost forgot that my chess set was included in an article in the Olympian.

10 things you won’t want to miss at the 2017 Fall Arts Walk

A twist on chess

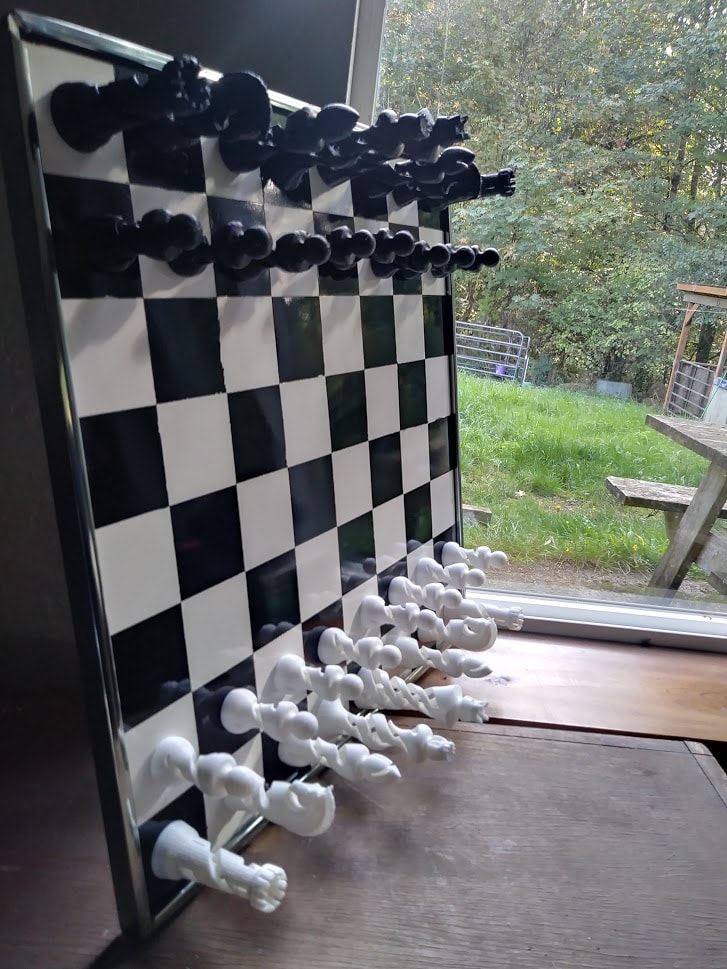
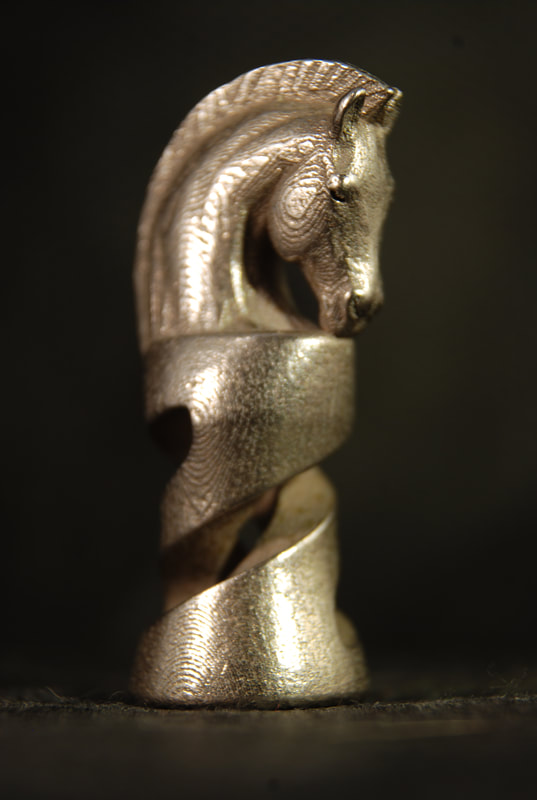
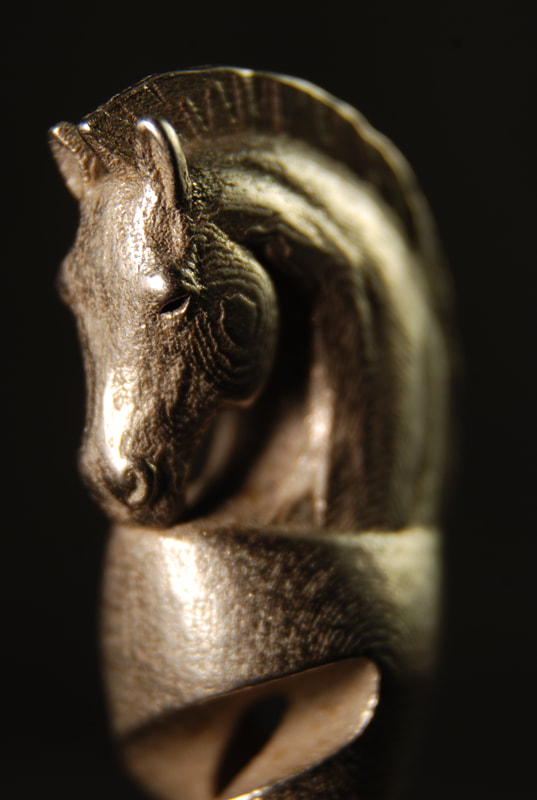
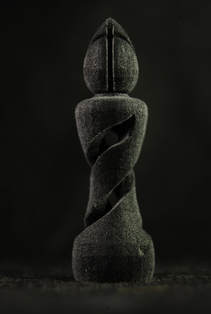
When he received a chessboard with no pieces, Chris Gizzi of Olympia wanted to make his own. But what he envisioned — pieces that incorporated spiraling double and triple helixes — would have been so difficult to fabricate that he set the idea aside. Now, thanks to the increased availability of 3D printing, he’s put his own twist on traditional pieces. See Gizzi’s work — along with paintings by Lonnie L. Spikes Jr. and Steven Suski — at Hot Toddy, 410 Capitol Way S. Hot Toddy also will host music by The Open Letters at 7:30 p.m. Friday.

MIXED MEDIA
0 Comments

2017 Fall ArtsWalk

10/2/2017

1 Comment

 
Picture
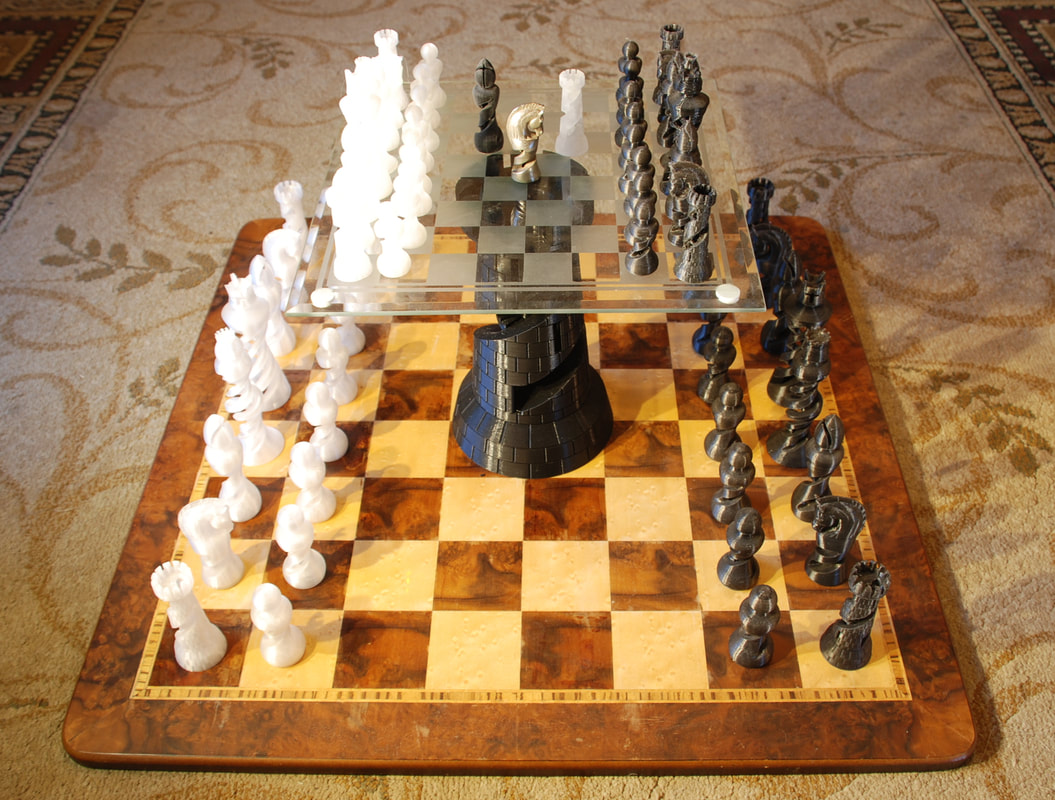
I will have two chess sets on display at Hot Toddy for the Fall 2017 ArtsWalk.  In addition to examples of the large and small sets printed in transparent PLA material, the display will also include one very large rook (supporting the smaller set), a black acrylic bishop, a transparent acrylic rook and a stainless steel knight.  Be sure to stop by this Friday evening.

Hot Toddy 410 Capitol Way South, Olympia, WA, 98501, United States 360-753-0868 shop@hottoddyboutique.com
1 Comment

New Prints from Shapeways.com

10/1/2017

0 Comments

 
New prints have arrived in time to be included in the Artswalk display.  All of these prints were printed at standard size and are excellent examples of the material options and level of detail available from Shapeways.com.
Picture

Knight in Stainless Steel

This knight was printed in stainless steel.  That's right printed steel. The lines that look like fingerprints on the sides are actually artifacts of the printing process and show the topography of the layers as they get deposited.

Chess Kight standard size in Stainless Steel
Picture
Picture

Rook in Clear Acrylic

 The clear acrylic rook pictured here to the left of to a FDM plastic (transparent filament) print for comparison.  The material captures a much finer level of detail and transparency that is possible with FDM printing.  If you click on the image, you can zoom and and see an amazing level of detail on the internal stairway.  Keep in mind this rook is only 2" tall.

Rook standard size in Clear Acrylic
Picture
Picture

Bishop in Black Acrylic

Another excellent example of the detail and precision possible with prints from Shapeways.  This material has an interesting and oddly directional velvet like surface reflection.

Bishop standard size in Black Acrylic
0 Comments

Olympia Artswalk Fall 2017

9/6/2017

0 Comments

 
ArtsWalk is approaching and I have been given an opportunity to display my chess set in the window of Hot Toddy. I am looking forward to the event but unfortunately I am double booked with a music performance that evening and will not be able to attend. 
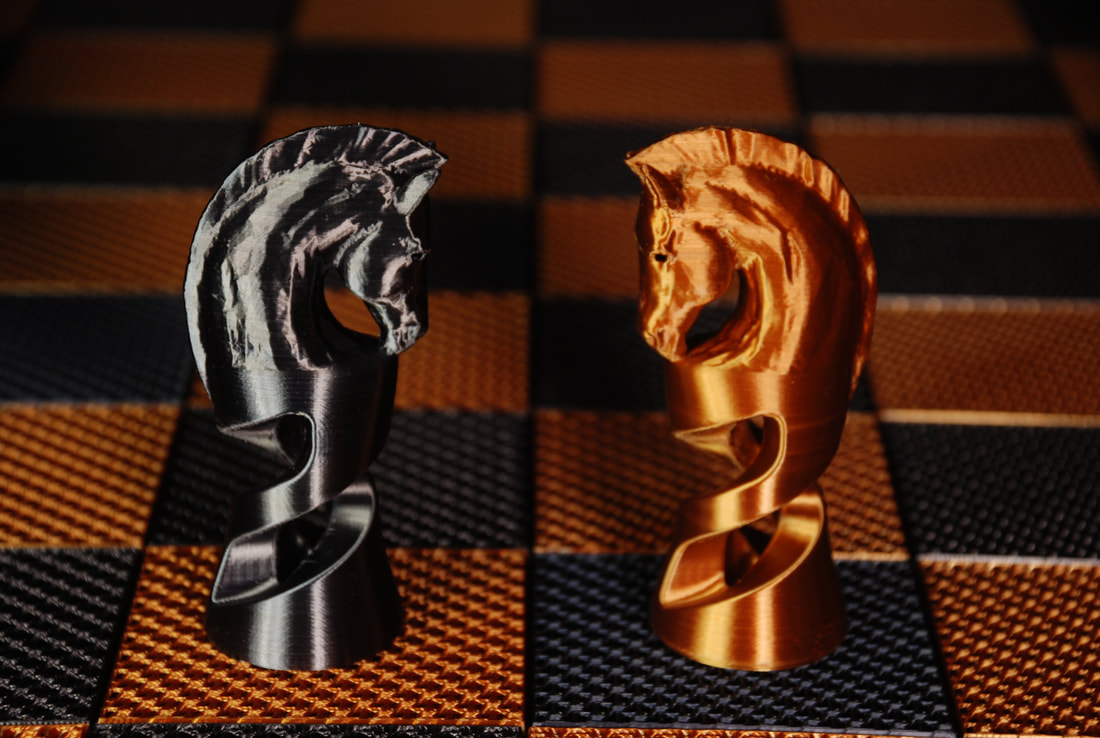
Picture
0 Comments

    Author

    Chris Gizzi

    Archives

    March 2020
    January 2020
    October 2019
    May 2019
    August 2018
    October 2017
    September 2017

    Categories

    All

    RSS Feed

Proudly powered by Weebly
  • Home
  • Maryhill Chess Set
  • Astrophotography
  • Blog
  • Roland GK Mount
  • Design Gallery
  • Contact
  • M3D Crane Quad
  • Chess Purchase